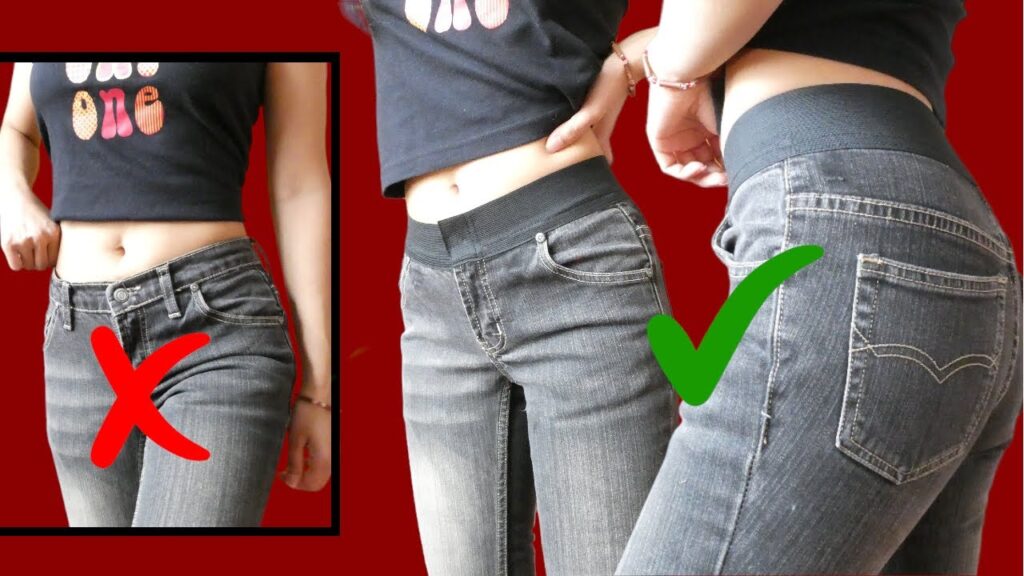
Inserting a waistband into pants is a useful skill that can help you adjust the fit of your clothing, especially if the waistband is too loose or too tight. Whether you’re refashioning old pants or customizing new ones, learning this simple technique can improve both comfort and appearance.
Step 1: Start by trying on the pants to assess how much adjustment is needed. This will help you determine the length of the elastic or drawstring you’ll be inserting. If the pants already have a casing or waistband channel, you’re ready for the next step. If not, you may need to sew one.
Step 2: Choose a suitable material for the waistband. Most people use elastic or a drawstring, depending on the style of the pants and desired comfort. Make sure it’s strong enough to hold but soft enough for comfort.
Step 3: Insert the elastic or drawstring. If there’s already a waistband channel, use a safety pin attached to one end of the elastic or drawstring to guide it through the channel. Gently push and pull it along the inside of the waistband until it comes out the other end.
Step 4: Adjust the fit by pulling the ends of the elastic or drawstring evenly. If you’re using elastic, sew the ends together securely. If it’s a drawstring, tie it in a bow or knot as needed.
This method is an easy and cost-effective way to fix or improve the waistband of pants at home. With just a few tools and some patience, you can make your pants fit better and look more polished—no tailor required!